Showing posts with label Fish. Show all posts

Thursday, June 5, 2014

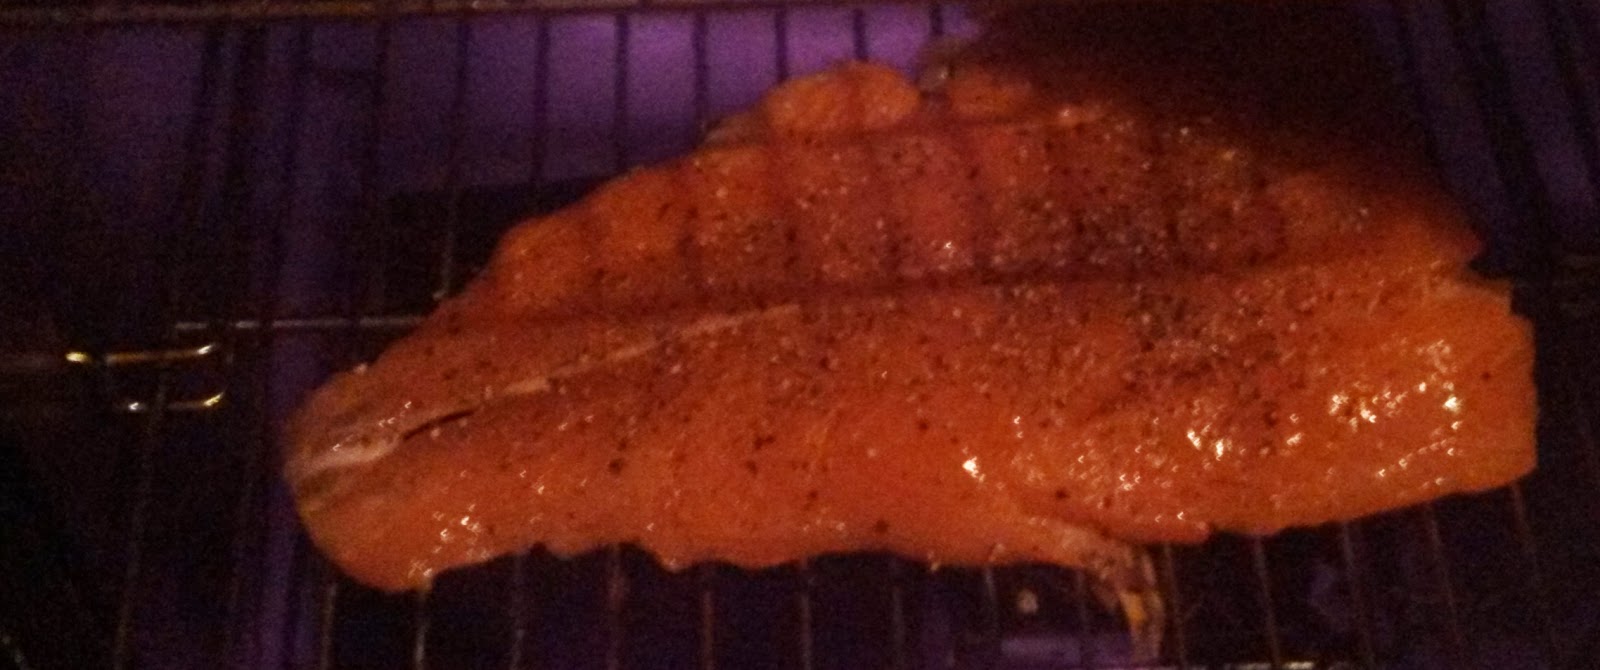
Smoked Salmon Filet


Ingredients
1  1 1/2 pounds salmon filet
1 1/2 teaspoon salt
1 1/2 teaspoon fresh cracked black pepper
1/2 cup alder wood
1 cup water


Step One:
Soak the wood chips in 1 cup of water for 30 minutes. While the wood chips soak bring the smoker to no more than 180 degrees F. Drain the wood chips and add the wood chips to the smoker. Wait ten minutes for the smoker to produce aromatic smoke.


Step Two:
Rinse and paper towel the filet of salmon dry. Notice the grain of the flesh and the whitish line that runs down the middle of the filet. Run your fingers against the grain (narrow side to wide side) along each side of the fillet. You may notice a bone or two. This is called a pin-bone, you can use a spoon or a pair of pliers to remove the pin-bones. The pin-bones must be removed.

Step Three:
Turn the salmon filet over look for any remaining skin, if you asked for the skin to be removed, remove any remaining skin. If you've  purchased a salmon filet with the skin on, that's okay.  The skin adds wonderful flavor complexities. To some, however, it is a fatty thing to toss away. In this preparation the fishmonger was asked to remove the skin, but it's not necessary.


Step Four:
Season both sides of the salmon filet with salt and pepper. At this point any additional ingredients can be added. This preparation doesn't add additional aromatics such as dill because the aim is to maximize the smoke flavor.

Step Five:
Smoke the Salmon for 20-25 minutes until it is medium.


 Step Six:
Place the salmon on a rack and reserve for 10 minutes.  Slice and enjoy.


Thursday, April 3, 2014

Grilled Salmon


1 1/2 pounds of salmon filet, skinned and pin bones removed
1/2 teaspoon salt
1/2 teaspoon pepper
1/2 teaspoon Everglades All-Purpose Seasoning
Cooking Spray or cooking oil

OR

1 1/2 pounds of salmon filet, skinned and pin bones removed
1 teaspoon salt
1 teaspoon pepper
1/2 teaspoon garlic powder
Cooking Spray or cooking oil


Step One:
Heat a grill pan over medium-high heat. Spray or brush oil on the grill.  While the grill is coming up to temperature, section the salmon widthwise into one inch pieces. Season the salmon on both sides.  Place the pieces on to the hot grill pan skin side ( or what was the skin side) up. Grill the salmon for about 1-3 minutes.


Step Two:
Turn the pieces over.  Using a fish turner is helpful here.  The presentation side will have beautiful grill marks. That's why that side is grilled first. Grill for about 1-3 minutes pending on your desired level of doneness. Like with tuna or steak. Salmon should not be over cooked. Once you've achieved your desired level of doneness remove the salmon from the grill to a plate or tray.  Allow the salmon to rest for about 3-5 minutes, and then serve.

Monday, December 2, 2013

Pan Roasted Cod with Lemon


Ingredients

4 6oz cod fillets
1 lemon, lemon sliced thinly
1/2 teaspoon salt
1 teaspoon fresh cracked pepper
Cooking Spray


Step One:

Season each fillet with salt and pepper.  Heat the skillet under medium-high heat.  Apply cooking spray to the skillet. Groupd three lemon slices in the skillet per fillet.  Place the fillets on top of the lemon slices and cook five minutes.


Step Two:

Carefully turn the fillets with the lemon over and cook for another five minutes.  

Thursday, October 17, 2013

Seared Cod with Green Mojo


Ingredients:

4 garlic cloves, pressed
½ cup fresh cilantro
1 tablespoon olive oil.
2 6 oz 1” thick cut cod filets
¼ teaspoon salt
pepper to taste
3 sprays of cooking spray

Step One: 
Place the garlic, cilantro and oil in a blender or food processor and blend/process until smooth. Alternatively a stick blender can be used. A classic mortar and pestle can also e used if one desires an upper body workout.  No matter the method employed once the mojo is made reserve it at room temperature.


Step Two: 
Remove the fish from the wrapper; if the filet is whole, then cut it in to two equal sized pieces. Take note there is a top side of the filet that is pale and even colored, and a bottom side that has a pattern of dark coloration.


Step Three: 
Spray a non-stick pan and heat it to medium-high heat.  Place the filets in the pan topside down.  Cook for five minutes. Turn the filets over using a traditional turner, or better yet using a fish turner and cook for another ten minutes.   Remove the filets from the pan to one plate each. Spoon the mojo over the filets and enjoy.

Monday, September 9, 2013

Sole with Lemon Caper Sauce


Ingredients

1/2 cup diced shallot
1 tablespoon butter
1 lemon juiced
1/2 teaspoon capers
1 pound sole filets  (appox 4 or 5)
1 teaspoon cooking oil or cooking spray

Step one:


Melt the butter over medium heat in a sauce pan; be careful not to let the butter burn. Add the shallots and reduce the heat to medium-low. Cook for five minutes stirring occasionally until shallots are translucent and slightly browned. Stir in the lemon juice and capers and lid the pan.


Step two:


Add oil to a large non-stick skillet over medium heat. Add the sole filets to the pan. Do not crowd the pan. Cook the sole for 3-5 minutes per side (depending on thickness). Using a fish turner (pictured below) turn the fish over to the other side to finish cooking.  Sole is notorious for falling apart so a fish turner is very  useful.


Step Three:

Place a filet on a plate and spoon the shallot lemon caper sauce over and enjoy.

Monday, July 8, 2013

Sesame Seed Encrusted Grilled Tuna

As I suspect for many of you, when I was growing up tuna was a fish in a can that didn't have much flavor until it was made into tuna salad, or a casserole.  Times have changed; now fresh tuna has caught on big time in the US.  It served in wide a variety of restaurants, and is available at most supermarket fish counters.  There are various types of tuna, and some are more sustainably caught than others. For more information regarding sustainably caught fish please visit  the Monterey Bay Aquarium Seafood Watch program website. 

Particular types and cuts of tuna are prized in sushi, and prices for those prime cuts can be very very expensive. This preparation uses the sashimi grade tuna from my local super market.  Sashimi grade tuna is a commonly found high grade of tuna. It is used in most sushi restaurants, and in beef terms would be comparative to USDA Choice.  Tuna is delicious on its own, however when pared with sesame seeds it takes on an otherworldly quality.  There's just something about the flavors of the toasted sesame seeds and the fresh tuna that bring out the best in both. This simple recipe follows the same cooking guidelines as our steak recipe. Tuna should never be cooked well. The flesh should always have some pink. Medium rare is the most if should be cooked any longer and it will become dry and tough. At that point you might as well simply have purchased canned tuna and made a tuna salad with a hint of sesame oil added at the end. 


Ingredients:
4   quarter pound 1 inch thick tuna steaks
1/2 teaspoon salt
1/2 teaspoon Pepper
1 teaspoon oil
1/2 cup toasted sesame seeds


Step One:

Season both sides of the tuna steaks with salt and pepper. Place the sesame seeds on a plate, or a shallow dish. One at a time press the tuna steaks on to the sesame seeds rotating them until tall the surfaces of the tuna steak are covered with sesames seeds.


Step Two:
Oil and preheat the grill or grill pan to high heat.  Place the tuna steaks on the gill for 4 minutes. Turn the steaks over and grill for another four minutes more. Remove to a plate and let the steaks rest.


Monday, June 10, 2013

Fish Tacos with Guacamole and Salsa

Growing up in the Mid-Atlantic region of the United States tacos were hard shelled, overly seasoned ground beef leaned, things that were made from a kit found at the grocery store.  Later they were fast food or chain restaurant fare.   Although seemingly silly and embarrassing to admit to, when I first heard of fish tacos in my early teens my first thought was yuck. I imagined some ground fish product with the same bright red taco sauce crammed in a hard corn tortilla donned with lettuce, tomato, sour cream and cheese.  It wasn’t until years later that I was properly introduced to fish tacos, and it was love at first bite.   Instead of being greasy, heavy, overly seasoned and very hard to eat, fish tacos were fresh, flavorful, light and served on very accessible soft flour tortillas.  They could be garnished with a wide array of toppings.  The fish itself could be grilled, fried, broiled, baked, sautéed, or even smoked.   The types of fish could very, each fish brought it’s own distinctive flavor and limitations to the taco.  Fish that are too delicate when cooked are not good candidates for fish tacos. Sturdy fish (or shark) seem to work best.   This preparation uses very accessible and affordable tilapia filets.   The tacos are donned with a small batch of guacamole and salsa. 


Fish Tacos (Makes 8 Tacos)
Ingredients:

1 ½ pounds tilapia filet
½ teaspoon cumin
¼ teaspoon chili powder
½ teaspoon black pepper
¼ teaspoon salt
2 teaspoons cooking oil (divided)
8 8-inch white flour tortilla


Step One:

Lay tilapia filets on a cutting board, pat them dry and season on both sides with listed seasonings.  In a non-stick skillet heat 1 teaspoon of cooking oil over medium high heat, add about 3-4 filets   The goal is to not crowd the pan.  Cook filets about four minutes on each side or until both sides are golden.  Reserve cooked fish to a plate. Add the remaining oil to the pan and repeat with the remaining filets.
(depending on their size) to the skillet.

Step Two:

Place one or two tortillas in a dry non-stick skillet over medium heat.  The object is to warm the tortilla and to cook out some of the raw flavor.  Heat the tortilla for about 1 minute each side. The tortilla should be warm and still pliable; if it’s crunchy you’ve gone too far.

Step Tree:

Tilapia filets have a dark line that can be used to separate the loin (the thicker meatier part of the fish).  Separate the filets a long this line, by simply breaking them.  Place equal sized portions of fish in each tortilla. Garnish with salsa, guacamole, cheese, sour cream or anything you fancy.


Guacamole
Ingredients:

½  cup diced onion
1 teaspoon chopped cilantro
1 pressed clove garlic
1/8 teaspoon salt
¼ red pepper flakes
1 small avocado
½ teaspoon lime juice

Step one:

In a large bowl add the onions, cilantro garlic, salt, and red pepper flakes. Peel the avocado and remove the seed or pit. Add the avocado flesh to the bowl.  Combine using a fork or potato masher. 


Step Two:
Whisk lime juice in to the mixture. Whisk until guacamole is light and creamy.


Step Three:
Refrigerate for 30 minutes so flavors can come together. To prevent oxidizing, add additional lime juice on top of  the guacamole, or press plastic wrap right on the surface of the guacamole to prevent contact with oxygen.


Salsa
Ingredients:

½ cup diced onion
1  large tomato, diced
1 ½ teaspoon diced cilantro
A dash of salt
1  pressed garlic clove


Step One:
Combine all ingredients in a bowl.

Step Two:

Refrigerate for 30 minute so flavors can come together.

Sunday, January 13, 2013

Making Lox


First up, is our adventure making Lox.  Lox are cured salmon filets they are similar to their cousins smoked  (but not cured) salmon and Gravlax (smoked and cured).   Like salting Cod, curing Lox was a way to preserve the fish.  Unlike salted cod, which must be soaked to remove the salt so that it can be used in recipes, lox are cured and seasoned to be eaten as lox.  

While many people enjoy lox in a multitude of preparations, most people don’t enjoy their hefty price, which can be as high as $30/pound. Yikes!  So why not try making them at home and save a little bit of cashola?  Well, first  there’s the little thing of learning how to make lox.  Good thing there’s the Internet. Depending on the search terms and search site you use the number of sites recipes is boundless.  Some use herbs, some pepper, and even some dried mustard. Although there are many variations the core preperation is roughly the same, that is Salt, Sugar, Compress, & Wait. 

Step One: Get da Fish

The first step involves the salmon. Different types of salmon, and other salmon like fish, have different flavors. If wild caught vs farm raised matters to you by all means get the fish you want to eat, because that's what this is all about.  

Ideally a center cut piece of roughly 1.5 pounds  1 to 1.5 inches thick cut in half  where both halves are of equal thickness should be purchased. The skin is left on the salmon. Never tried it with the skin removed, but it may work.  The equal thickness is really important because you'll want equal curing. 

If you can't afford or can't find big thick pieces of salmon, then get two thinner pieces of equal size, you'll just have a shorter curing time. 


Even in the center cut pieces you'll see the thinner edge of the salmon filet, trim.  The trim should be removed, it will cure very fast and because of the texture it may taste funny.  Now, don't toss it, because you can cook and eat it, just not recommended for this preparation.


To remove the trim use a sharp knife to cut in about 1/4-1/2 inches or more depending on the filet.

Next there's checking for pin bones. Most fishmongers do a good job at removing these bones, however it's always a good idea to check. simply run your fingers down the filet against the grain, you'll feel them if they are there.  To remove use pliers or a spoon (there's a kitchen tool for this, but pliers work fine). 


Step Two:  Get Da Seasonings 


Now that the fish is taken care of slip her in the fridge and now on to the base, salt and sugar. Here you'll see some variations. The kernel to take away with is you'll need less sugar than salt at least 1:3 or even 1:4. 

IMPORTANT: AVOID ANY SALT WITH IODINE.  

Most recipes recommend Kosher salt, and that's the one used here, but pickling salt, or even rock salt may work. We didn't try sea-salt, it may work but you may need to add more depending on it's salinity, and it's also pretty pricy and the goal of this is to save some cashola!  Non-ionized salt table salt presumably could be used, and if it works please share your results in the comments.  


Second is the sugar, brown sugar was used, presumably white sugar could also be used, brown sugar imparts a deeper flavor, but that's your call really. The idea of the sugar is to offer some sweetness, and to an otherwise salty endeavor. 

Which ever you sugar or salt you go with you'll need to mix them together and rub them on the salmon. 

Here is where you can add all that other stuff you may find in various recipes such as Dill, Ground Mustard, Pepper, and you name it. 

Where to start is your call, but both pieces front and back (skin side) should get a good rub down.  It's more a rub and a pat down. If you've ever made a dry rub for BBQ it's the same idea, and if you haven't stay tuned for our BBQ post. 


Step Three:  Marry, Wrap and Compress


Rub-A-Dub-Dub you're done with the rub, now you get to marry the two pieces together flesh sides in and skin sides out.  A good tip here is to do this on top of plastic wrap because the next step will be to wrap them in plastic wrap.  If you don't you'll end up with  more of your rub on your hands.


Once you've wrapped your married filets place it in a container big enough to hold them and a compression device such as a brick or a heavy pot or weight.   You'll want something that will press the  filets together, but clearly something that will fit in and won't damage your fridge.  

An old pot worked here,  once you weight you put the container with the salmon and weight in the fridge and you well, wait. 

A few days in you'll see fluid in the container, pour it off and place everything back in the fridge. The fluid will be darker if you used brown sugar. 


Step Four: Unwrap, Rinse (Really Important) and Enjoy (or Freeze)

After a 4-6 days, depending on the level of cure you want, but please know a longer time will yield a firmer constancy. Curing for too long will make it hard much like salted cod which isn't lox, but salted salmon.  Yuck!  Please remember if you have thinner filets you'll need a shorter curing time than thicker filets. 

The filets will be encrusted with salt and sugar.  An important step is rinsing the salmon. Curing will keep occurring and the fish will harden if this step is skipped. Also the fish will be too salty to eat. 

To rinse simply run the salmon under cold water for a few minutes, or soak it for a few minutes (not too long) in a water bath. 

You may find you have to brush some of the salt away, that's just fine. 


Next up is the enjoyment of eating your own lox!  Using a knife slice the filet and do what ever you want: bagels, eggs, salads, crackers, whatever!  


Now, you may make more than you can enjoy at the present time. Good news, you can freeze lox for about six months. The best way is if you have one of those vacuum seal machines, but even if you don't  you can place them in a freezer zip top bag being careful to get as much air out as possible and freeze to enjoy later.   To thaw, place frozen lox in fridge until thawed. 

There you have it lox!